Diferencia entre revisiones de «ENG:Trekking Torres del Paine»
(→Record de velocidad) |
(→Day 3: Dickson - Los Perros) |
||
| (No se muestran 58 ediciones intermedias de 4 usuarios) | |||
| Línea 1: | Línea 1: | ||
| + | [[ES:Trekking Torres del Paine]] | ||
| + | {{Indexed}} | ||
{{Itinerarios Torres del Paine_en}} | {{Itinerarios Torres del Paine_en}} | ||
| − | {{ | + | {{RutaForme |
|Actividad=Trekking | |Actividad=Trekking | ||
| − | |País=Chile | + | |
| + | |País=Chile (english) | ||
|CiudadesChile=Puerto Natales | |CiudadesChile=Puerto Natales | ||
|BellezaEscenica=Impresionante | |BellezaEscenica=Impresionante | ||
|Atractivos=Vistas panorámicas, Glaciar, Bosque, Fauna atractiva, Lago, Río, Formación Geológica, Parque Nacional | |Atractivos=Vistas panorámicas, Glaciar, Bosque, Fauna atractiva, Lago, Río, Formación Geológica, Parque Nacional | ||
| − | | | + | |Duracion=8 - 10 días |
| − | + | Algo Exigente | |
| − | + | ||
|Sendero=Siempre Claro | |Sendero=Siempre Claro | ||
|Señalizacion=Suficiente | |Señalizacion=Suficiente | ||
|Infraestructura=Hotel(es), Cabaña(s), Hospedaje(s), Refugio(s), Camping | |Infraestructura=Hotel(es), Cabaña(s), Hospedaje(s), Refugio(s), Camping | ||
| − | | | + | |
| − | | | + | |ComparteIdayRetorno=Circuito |
| − | | | + | |Latitud1=-51,177809 |
| + | |Longitud1=-72,960217 | ||
| + | |Latitud2=-51,072976 | ||
| + | |Longitud2=-73,093223 | ||
| + | |Latitud3=-50,972646 | ||
| + | |Longitud3=-72,875176 | ||
| + | |Distancia=117700 | ||
| + | |||
| + | |MetrosAscenso=5566 | ||
| + | |MetrosDescenso=5566 | ||
| + | |Comentarios distancia= | ||
| + | |AltitudMedia= | ||
|Primer Autor=Patricia.Meneses | |Primer Autor=Patricia.Meneses | ||
|Imágen Principal=Cuernos_del_paine.jpg | |Imágen Principal=Cuernos_del_paine.jpg | ||
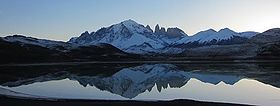
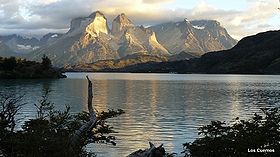
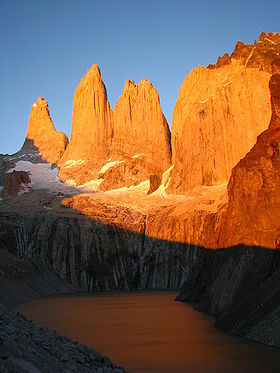
| − | |ComentariosImagen=Cuernos del Paine | + | |ComentariosImagen=Cuernos del Paine from Camp Italiano. Feb. 2002. File: Francisco Reyes |
| + | |m=https://www.google.com/maps/d/u/0/embed?mid=1YkBgYt9iMDf3KfXmKVLHCQenBhnAFLpS | ||
|KMLZ=Trekking Torres del Paine.kmz | |KMLZ=Trekking Torres del Paine.kmz | ||
|ComentariosMapa= | |ComentariosMapa= | ||
| − | + | {{colores|red|Section shared with [[W circuit Torres del Paine]]}} | |
| − | + | {{colores|blue|The rest of the circuit, not as popular}} | |
| − | + | {{colores|yellow|Alternatives to Dickson glacier (described below as an aditional day), the hike to [[Mirador Zapata]] and the walk from the park entry (CONAF post) to Paine Grande Camp (see [[W circuit Torres del Paine]])}} | |
| − | + | {{colores|white|Roads}} | |
| − | + | {{Colores|green|Boats}} | |
| − | | | + | |TipoDeMap=HYBRID |
}} | }} | ||
==Introduction== | ==Introduction== | ||
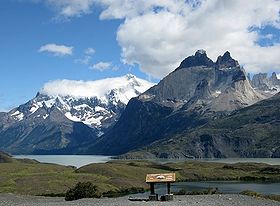
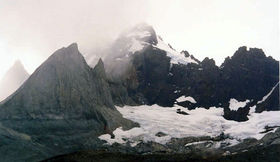
| − | [[Imagen:Lago Grey, Valle del Frances y Cuernos del Paine desde Hosteria Lago Grey por David Thyberg.jpg|thumb|500px | + | [[Imagen:Lago Grey, Valle del Frances y Cuernos del Paine desde Hosteria Lago Grey por David Thyberg.jpg|thumb|500px|Lago Grey, Valle del Francés, Cuernos del Paine from Hostería Lago Grey by David Thyberg]] |
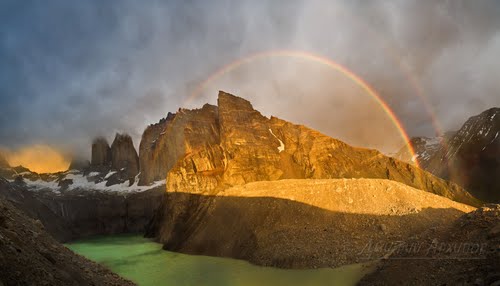
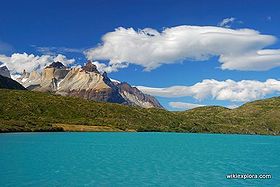
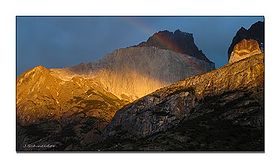
| − | [[Imagen:Mirador de las Torres con arcoiris por Dmitry Arkhipov.jpg|thumb|500px | + | [[Imagen:Mirador de las Torres con arcoiris por Dmitry Arkhipov.jpg|thumb|500px|Las Torres and rainbow, by Dmitry Arkhipov]] |
| − | ' ' | + | The '''Torres del Paine Trek''' is one of the most spectacular destinations in the world. In fact, according to a review of 9 specialized books that make their own selections of the best routes in the world, Torres del Paine is the most frequently named (you can check the study out in [[Best Treks / Hikes of the World, top 100]]). Unsurprisingly, it is extremely popular, and it is strongly advised to visit the route from November to early December, to avoid the massive flow of walkers of January and February. |
| − | Before | + | Before you start with this description, please read the [[Itineraries Torres del Paine National Park| Suggested itineraries]], to decide what's the best way to enjoy your days there. You can also get a general idea of [[Parque Nacional Torres del Paine|Torres del Paine National Park]]. |
| − | Note that although this route is located in Patagonia, famous | + | Note that although this route is located in Patagonia, famous by its remoteness and harsh climate, this is a low altitude trek and equiped with good infrastructure, so it's a trip that anyone reasonable fit can do, with or without experience, and certainly without guides. |
| − | That said, if you have no experience | + | That said, if you have no experience whatsoever trekking, it is especially important to pay attention to the advicse regarding equipment and food: it is very common for inexperienced people who rush to this hike to suffer carrying heavy and/or very poor quality food or equipment. While it is a challenge that anyone can take, you can not just bring the family pot that weights half a kilo from home, a solid stove designed for car-based camping, or those bulky shoes more oriented to industrial tasks than to the idea of walking 7 hours day. |
And now, enjoy! | And now, enjoy! | ||
==Best season== | ==Best season== | ||
| − | The | + | The best time for this route is between November and March. November and December are ideal, when the weather has improved, the days are long and there are not as many people doing the circuit as in January or February. Winter is a beautiful time, but the circuit is too lonely for these months, and so at that time is the [[W circuit]] is preferable, or the far less ambitious hike to the [[Base of the Torres del Paine]]. |
{{Acceso Parque Nacional Torres del Paine_en}} | {{Acceso Parque Nacional Torres del Paine_en}} | ||
| Línea 49: | Línea 64: | ||
==Description of the route== | ==Description of the route== | ||
| − | The Paine Circuit is a walk of 8 | + | The Paine Circuit is a walk of 8 effective days (increasing to 9 if you chooso to walk to Dickson Glacier as well). It must be done counterclockwise from Serón to Grey, and it includes two full day sidetrips (Valle del Francés and the base of Torres del Paine) and a branch of a couple of hours (Glacier Punta Puma) |
| − | [[Imagen:Mapa_circuito_torres_del_paine.jpg|center|frame| | + | [[Imagen:Mapa_circuito_torres_del_paine.jpg|center|frame|General map of the Torres del Paine Circuit]] |
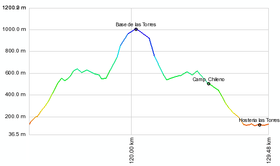
| − | The following image shows the altitude profile of the route. | + | The following image shows the altitude profile of the route. Note that this is a low altitude trek, but, given the harsh climate of the place, mountain conditions can occur even in the summer months. |
| − | [[Imagen:Perfil_circuito_torres_del_paine_.png|frame|center| | + | [[Imagen:Perfil_circuito_torres_del_paine_.png|frame|center|Profile of the route]] |
===Day 1: Hostería Las Torres - Serón=== | ===Day 1: Hostería Las Torres - Serón=== | ||
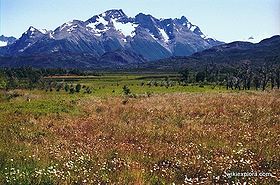
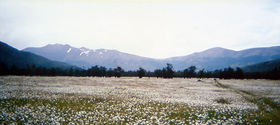
| − | [[Imagen:Seron margaritas.jpg | + | [[Imagen:Seron margaritas.jpg|thumb|280px|Daisies just before Serón. Imagen: [http://www.panoramio.com/user/1638473 Gabcpd]]] |
| − | [[Imagen:Margaritas en sector Campamento Seron por Jaredk.jpg|thumb|280px | + | [[Imagen:Margaritas en sector Campamento Seron por Jaredk.jpg|thumb|280px|Margaritas en sector Campamento Serón por Jaredk]] |
| − | '' 'Note: | + | '''Note: Altough it has been designated as day 1, it may also be the 2nd day if you choose to hike to the base of Torres del Paine (day 8 here) first instead of last'''. |
| − | + | The path to the circuit starts behind the lodge "Las Torres". After a little more than 100 meters the first sign appears, showing the path towards Seron camp. Climb a small hill and then cross a wooden gate (please close it once crossed, like all others). The trail traverses an open, uncluttered area with scattered trees (especially beech and notros). From this point, Mount Almirante Nieto (2,640 m) starts to dissapear, after dominating the area of Las Torres. | |
| − | + | Laguna Amarga then appears. The entrance to the National Park and the vehicular road to the area of plains become visible. It is an lower area, with a more stable and drier climate than the western side of the park, whose mountains trap moisture from the Pacific. Behind us we can see, in the distance, Mount Balmaceda (2,036 m). After about half an hour a second wooden gate has to crossed to start walking through a wooded area, where soon another signaling post appears, and a fence runs parallel to the path we have been following. Fifteen minutes later, a small spring is crossed through a wooden bridge. Continuing along the path, it will enter and exit the forest cyclically another cpuple of times. | |
| − | After about an hour of walking, a new signal is shown. From this point, we can see | + | After about an hour of walking, a new signal is shown. From this point, we can see Laguna Azul in the distance, and the Paine river in the lower valley. Now it will be seen more clearly in the whole area of the northeastern shore of Paine (the opposite bank of our trail), the effects of the fire that broke out on February 17, 2005. |
| − | + | After an hour and half, you pass over a second stream, opposite to Laguna Azul and with good view of the valley of Paine, the river that gives the park its name. The trail then circles the Paine (1,508 m., not to be confused with the Paine Grande of 3,050 m and the southernmost "three thousand" of America), whose slopes contain lots of burned logs due to frequent fires of the twentieth century. Ahead, there will be a major creek, to which the trail gently descends, carrying a significant amount of water. Then there is a new wooden gate, and then the trail descends to an open area with some ñirres on the sides. | |
| − | + | Later the path goes down to a confluence of two paths: the one we have been following and the one that comes from Laguna Amarga. There's a new poster and another locking wooden bar. We are now in a wide, flat terrain to traverse along the Paine River, beautifully covered with daisies and some ñirres, isolated or in small forests. After 20 minutes there is a rustic railing provided with a rope. When you get closer to the river, there will be a forest of ñirres. | |
| − | Shortly before | + | Shortly before Serón a fence must be crossed. The track passes along a slope where the hill reaches river, the last point before reaching the site. There is a stream with clean water, several picnic tables by the "puesto" of the old ''estancia'', and a small warehouse. |
| − | + | '''All campsites must be paid in advance, and you will not be able to start the hike if you can't show the rangers that you have a booking for each campsite on consecutive nights.''' | |
* '''Total expected time for this section''': 3h 20' | * '''Total expected time for this section''': 3h 20' | ||
===Day 2: Serón - Dickson=== | ===Day 2: Serón - Dickson=== | ||
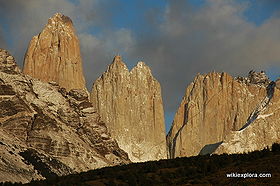
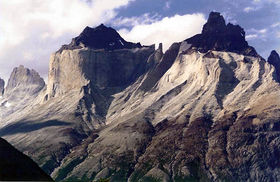
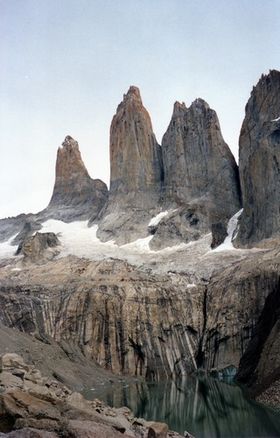
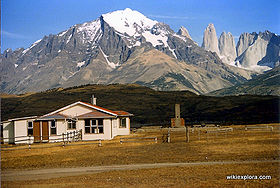
| − | [[imagen:Torres_por_detras.jpg|thumb|280px|left| | + | [[imagen:Torres_por_detras.jpg|thumb|280px|left|Unusual look of Las Torres del Paine viewed from the north, by Francisco Reyes]] |
| − | [[Imagen:Torres y Lago Dickson desde sector Refugio Dickson por Fernando Palma.jpg|thumb|280px| | + | [[Imagen:Torres y Lago Dickson desde sector Refugio Dickson por Fernando Palma.jpg|thumb|280px|Las Torres and Lago Dickson from Refugio Dickson, by Fernando Palma]] |
| − | [[Imagen:Cerro Ohnet entre Refugio Dickson y Campamento seron por Tetsuya.jpg|thumb|280px | + | [[Imagen:Cerro Ohnet entre Refugio Dickson y Campamento seron por Tetsuya.jpg|thumb|280px|Cerro Ohnet, taken between Refugio Dickson and Campamento Serón, by Tetsuya]] |
| + | From Seron advance 200 meters parallel to a fence, and then cross it. The walk still goes through the meadow of daisies and occasional ñirres. It will continue along a marshy area located to the right of the path. After about 25 minutes, it passes through a stream that flows to a tributary of the Paine River. Then the trail climbs along the river and becomes more rocky, while the first ''neneos'' arise, a curious shrub with a rounded form, as well as some calafates (possibly without its famous fruit, due to the frequent passage of walkers). After 250 meters, it will be possible to observe a lagoon with a characteristic kidney shape, at which point there is a sign indicating the route. It will then start a zigzag ascent along a section of screes, to an altitude of 400 meters, in the so called Paso del Viento ("windy pass"), a name well earned. At that point, the trail bends to the west, allowing the Paine lake to be observed in its entirety. From this point, you enter a wilder area of the park, and the path forward is clearly seen: the way to Coirón, the Dickson camp, Los Perros Glacier to the left and the valley leading to the John Garner Pass. To the right, away from the trail, Mount Ohnet of 1,929m can be seen. The path descends by the side of Paine Lake. Half way there is a small spring. After the second half of the lake, progress is retarded by fluctuating ups and downs. | ||
| − | + | An hour and a half after Paso del Viento you arrive at an old camp at Coirón. The place is deserted, devoid of natural attractions and is very close to Serón, making it a bad choice for camping. There is a small stream. Ten minutes later, we reach the stream that comes from the waterfall visible upslope. The trails then continues along the hillside, past a marshy area on the right. You can now see more clearly Los Perros Glacier. Dickson Glacier is also visible under the Daudet and Cubo mountains, one of the many drains of the east side of the Southern Ice Field, . A flat stretch follows, with some minor hills. Near the lake, you can see the unusual view from the north of Torres del Paine, and mount Oggioni (1,697 m.) to the left. | |
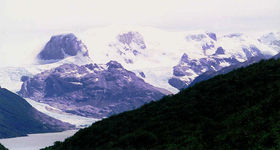
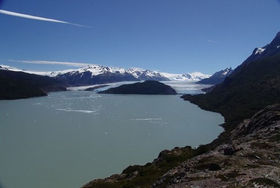
| − | + | [[File: Glaciar_dickson.jpg | thumb | 280px | right | Glacier Dickson and Southern Ice Fields, in rouye to Dickson campsite. February 2002 File: Francisco Reyes]] | |
| − | + | ||
| − | [[ | + | |
| − | + | ||
| − | + | ||
| − | + | ||
| + | This area is marked with stakes, at whose sides there are numerous traces of the twentieth century fires made to clear grasslands for livestock. About two hours after Coirón you reach the foot of a hill, where there is an abandoned building in a marshy area. Only half an hour later you arrive to Dickson. | ||
| + | '''All campsites must be paid in advance, and you will not be able to start the hike if you can't show the rangers that you have a booking for each campsite on consecutive nights.''' | ||
* '''Total expected time for this section''': 5h 40' | * '''Total expected time for this section''': 5h 40' | ||
| − | ===Optional day: | + | ===Optional day: Dickson Glacier=== |
| − | First, it is necessary to cross the river in a zodiac, available | + | First, it is necessary to cross the river in a zodiac, available during the summer months, which can be booked at the campsite. A flag in the place gives notice of leaving trekkers. Once on the other side of the lake, walk up the slope to get on the path leading to Paine lake. To the left there is a hill and to the right the Paine River. The trail continues north around a rock plateau located to the left, untill it reaches an open field. The unusual north face of Torres del Paine can be observed, and the range that leads to Paso John Garner (the one that will be faced in two more days). |
| − | After 30-35 minutes | + | After 30-35 minutes you will find stakes at the left of the road, traces of an old fence. A sign indicates to "Carabineros" (police). At that point you should turn left and continue parallel to the stakes towards the Dickson glacier. The trail is fuzzy on this stretch, so it is important tofollow the old fence or the orange stakes, in a rather flat terrain. To the left there is a rock plateau. Then you will enter a wooded area, and in a short while you will cross a stream. After 10 minutes the trail turns to the left, towards a gorge, where a there is a pass. But our route ascends a hill and then goes through the side of a scree. |
| − | After half an hour | + | After half an hour you get to Quemado Lake (300 m) east of Lake Dickson, in an environment marked by ancient fires, but that is slowly recovering. The trail goes up and down several times. After a half hour from Quemado Lake, you will return to an area of mature forest, not destroyed by fires. The trail here is marked with orange color. There are wooden bridges and walkways built by Carabineros. As the forest is left behind, the glacier appears. The trail goes through a swampy area and then reaches a small hill to the left, which we recommend to climb, to take advantage of its magnificent view. |
| − | About 15 minutes later, after passing another forest with streams and bridges, the trail climbs to an open space where the | + | About 15 minutes later, after passing another forest with streams and bridges, the trail climbs to an open space where the Carabineros post is located, to covers the border area adjacent to Southern Ice Field. Few minutes past the police post you will find the splendid Dickson viewpoint, where the mountains Daudet and Cube will be observed, besides the glacier. |
| − | * '''Total expected time for this section''': 2h 55' | + | * '''Total expected time for this section''': 2h 55' one way, 2h 30' to go back, plus the time required to cross the river. |
===Day 3: Dickson - Los Perros=== | ===Day 3: Dickson - Los Perros=== | ||
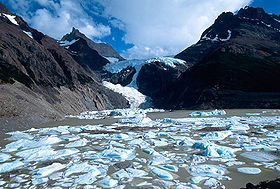
| − | [[Imagen:Glaciar Los Perros desde sector Campamento Los Perros por Heinz Weber.jpg|thumb|280px| | + | [[Imagen:Glaciar Los Perros desde sector Campamento Los Perros por Heinz Weber.jpg|thumb|280px|Glacier Los Perros from Los Perros camp, ny Heinz Weber]] |
| + | The day starts with the path marked by a flag, which leads to a dense forest composed mainly of ''lengas'', but also by ''coigües'' and ''notros''. After 15 minutes you will be see at your back Dickson Lake and the glacier of the same name. At 350 meters of altitude you must cross an old fence. A more mature forest follows, and a wooden walkway follows. | ||
| − | + | Then there is a great viewpoint in an open partly-flooded space. There is a small hill with good views. The trail turns left along the marshy area and then descends to the Cabeza del Indio River, where a wooded bridge. The track then climbs a muddy area and advances to the southwest along the Los Perros river valley. After about half an hour from Cabeza del Indio there will be a waterfall. The trail continues next to the river, with little slope, under the shadow of the forest, interrupted by occasional fallen trees and frequent streams of fresh water. | |
| − | + | Two and a half hours after the waterfall a suspension bridge that crosses the Perros River is reached. At this point, Los Perros Glacier becomes visible. The trail climbs the moraine in a stretch where the trail becomes less clear. After 15 minutes the top of the small moraine is reached, boasting a beautiful view of the glacier and its lagoon, usually populated by floating ice. We also see the route to "El Paso". Go on along the the moraine. | |
| − | + | The campsite is located in a ''lenga'' forest, at 540m. There is a small store, restrooms and sites for bonfires. | |
| − | Two and a half hours after the waterfall | + | |
| − | The campsite is located | + | |
| + | '''All campsites must be paid in advance, and you will not be able to start the hike if you can't show the rangers that you have a booking for each campsite on consecutive nights.''' | ||
* '''Total expected time for this section''': 4h 20' | * '''Total expected time for this section''': 4h 20' | ||
| − | ==== | + | ====Side hike to Punta Puma Glacier==== |
| − | + | From Los Perros, follow the track that leads to the pass. After crossing the river by the bridge, continue straight along the river O'Brien instead of turning left towards the pass. You will walk by the river in a space devoid of vegetation. When it's no longer possible to continue on this course, make your re-entry to the forest. The trail is blurred and it lacks signs, but it's easy enough to advance parallel to the river, under the shade of a dense forest. Then you will walk up a hillside and the river will be visible down, in a narrow bed. | |
| + | |||
After about 25 minutes, you will reach an area of scrubby vegetation growing on the moraine, from which point the Punta Puma glacier is already visible. | After about 25 minutes, you will reach an area of scrubby vegetation growing on the moraine, from which point the Punta Puma glacier is already visible. | ||
| − | |||
| − | |||
| − | |||
| − | |||
| − | + | Then you have to cross a small barrier of loose stones before reaching a rocky terrain, devoid of vegetation. An isolated clump of young ''lengas'' surprises in this landscape. The remaining distance to the glacier is just a path of little slope. | |
| − | + | ||
| + | After an hour of walking, and at 750 meters of altitude, the glacier is reached. The lower end is covered with rocks. and flows with a gentle slope to the valley. You can walk a little over it, to an area of white ice. | ||
| + | If you do this branch, it is advisable to go if you arrive no to late to Los Perros, but it is not recommended to allocate a full day to it. | ||
| − | + | * '''Total expected time for this section''': 1h to the glacier, 45' back | |
| − | + | ||
| − | + | ||
| − | + | ||
| − | + | ===Day 4: Los Perros - Paso John Gardner - Guardas=== | |
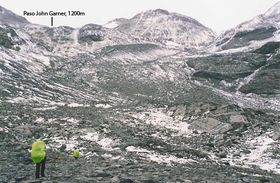
| − | After 40 minutes from the previous point, you | + | [[imagen:Paso_John_Garner.jpg|thumb|280px|To John Gardner pass, looking west. Feb. de 2002. File: Francisco Reyes]] |
| + | This is the hardest day. From Los Perros continue down the path across the river by the footbridge. Then turn left, heading towards the Pass. The trail has been marked in the trees for some stretch. Then cross a swampy area (it's the only part of the whole trek where gaiters would de helpful) that will last for the next hour. There are some open areas with good views. | ||
| + | After an hour and a half, at 760m, the trails approaches the Paso river, Cross guided by the orange markings on a narrower section. It is important to get this place right, because it is not easy to cross at other points. The path continues climbing on the other side of the river, leaving behind the swampy area. Now it is usually windy, and the terrain rocky, with the orange markings on the rocks. From several hundred meters below the pass, it becomes likely to find snow even in the summer months. If there is rain forecasted for the park, it is likely that here it will snow. | ||
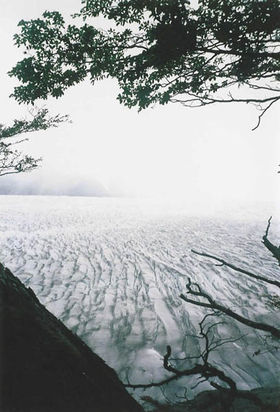
| + | [[File: Glaciar_grey_bajando_del_paso.jpg | thumb | 280px | right | Glacier Grey and Southern Ice Fields from the drop step. Feb. 2002 File: Francisco Reyes]] | ||
| + | John Gardner pass is at 1200 m., 1 ½ hours beyond the river crossing. It allowes to cross the massif of the Cordillera del Paine to the western sector of the park. The views of the Southern Ice Fields and Grey Glacier are spectacular, so, coupled with the possibility of snowfall described, it is strongly suggested to do it only with good weather. There are orange rods that serve to guide the way when the weather worsens the visibility. The descent follows a moraine, always with stunning view. The retreat of the glacier can be appreciated: the former nunatak is now a peninsula, and has recently appeared a second nunatak. After 15 minutes of descent, at 950m. the first glimpses of vegetation appear, with some ''lengas'' dwarfed and bent by the wind. As you walk through the forest, the glacier is visible through the branches. The descent is steep and demanding. | ||
| + | |||
| + | At 550 m. and after just under 2 hours of descent, an old camp sector is reached. It's a rather narrow place, nestled among the trees, indicated by the sign "Camp El Paso." Continue in a southerly direction parallel to the glacier. There are some areas with large ''lengas''. | ||
| + | |||
| + | After 40 minutes from the previous point, you arrrive to camp El Paso, located in a narrow sector along the trail, by a creek. There is a small bathroom and an open container that serves as a shelter and natural gathering place for campers. It lacks services or toilets, but it's free. | ||
* '''Total expected time for this section (untill El Paso)''': 5h 45' | * '''Total expected time for this section (untill El Paso)''': 5h 45' | ||
| − | '' 'Note' '' <br> | + | '''Note''' <br> |
| − | From this point (which in this review are listed as 5 and 6) how to distribute | + | From this point (which in this review are listed as days 5 and 6) how to distribute your time is not as clear as on days 1 to 4. Day 7 clearly will be to Hosteria Las Torres but the starting point may vary. Day 8 (which can also be day 1) is almost fixed too (except for those willing to follow the [[Valle del Silencio]], who may take two days) so only days 6 and 7 show a significant dispersion of options among trekkers. |
| − | * Option 1: recommended in this review. | + | * Option 1: recommended in this review. Camp at Guardas (free camping but no services. Next day, walk to Paine Grande. Next day, go to Camp Italiano, leave the camping gear, continue to Valle del Francés and back to Camp Italiano. |
| − | * Option 2: | + | * Option 2: Camp at El Paso. Next day, walk to Paine Grande (a demanding day), and the next day go to Camp Italiano, leave the camping gear, continue to Valle del Francés and back to Camp Italiano. |
| − | * Option 3: | + | * Option 3: Camp at Guardas. Next day walk to Paine Grande, and the next day go to the Camp Británico. Then follow from Británico to Las Torres in a single tranche. |
| − | * Option 4: Keep walking to the | + | * Option 4: Keep walking to the camp Grey, in other 4-4 1/2 hours (a pretty hard day). Next day, reach the camp Italiano, and the next day go up and down Valle del Francés. |
| − | Other options that combine the above. | + | *Other options that combine the above. |
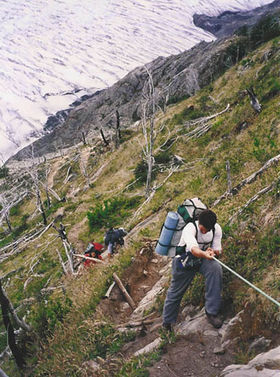
| − | From | + | From the pass, climb a long slope that leads to a viewpoint of the Grey. The trail continues well marked with many ups and downs, and frequent roots that must be overcome. Several small streams and a second viewpoint is then crossed. Then, keep going through an area of cliffs and old fires, where there are visible traces of burned trees. After an hour of walking you will find a larger creek, where a rustic ladder helps the ascent. It is followed by a steep cliff on the banks of the Grey Glacier. Twenty minutes later, there is another gorge provided with a wooden staircase. Past the cliffs area, you reenter the forest of ''lengas'' and ''coigües''. Then follows another creek, with huge cliffs that drop to the glacier. |
* '''Total expected time for this section (untill Los Guardas)''': 8h 45' | * '''Total expected time for this section (untill Los Guardas)''': 8h 45' | ||
===Day 5: Guardas - Paine Grande=== | ===Day 5: Guardas - Paine Grande=== | ||
| − | [[Imagen:A_los_guardas.jpg|thumb|280px| | + | [[Imagen:A_los_guardas.jpg|thumb|280px|Ropes help in the Grey Glacier area]] |
| − | From | + | From Los Guardas the route continues through the forest. After 35 minutes a viewpoint of Grey Glacier is reached. Then the trail leaves the glacier and takes us through forest. An hour and a half from Los Guardas there is a signposted junction leading to the ''refugio'' and to the trail that leads to the viewpoint. |
{{Grey - Paine Grande_en}} | {{Grey - Paine Grande_en}} | ||
| Línea 168: | Línea 184: | ||
===Day 6: Paine Grande - Valle del Francés=== | ===Day 6: Paine Grande - Valle del Francés=== | ||
| − | {{Paine Grande - Valle del | + | {{Paine Grande - Valle del Frances en}} |
===Day 7: Valle del Francés - Hostería Las Torres (Los Cuernos del Paine)=== | ===Day 7: Valle del Francés - Hostería Las Torres (Los Cuernos del Paine)=== | ||
| − | {{Valle del | + | {{Valle del Frances - Hosteria Las Torres en}} |
| − | ===Day 8: | + | ===Day 8: Torres del Paine (2 days if you extend it to [[Valle del Silencio]])=== |
{{Base de Las Torres_en}} | {{Base de Las Torres_en}} | ||
| − | *'''Total expected time for this section''': Three and a half hours | + | *'''Total expected time for this section''': Three and a half hours up, two hours return, plus the well deserved time off to take pictures in the viewpoint. |
| − | ===Total expected time for the | + | ===Total expected time for the whole Torres del Paine circuit=== |
| − | + | This review shows 8 days, or 9 if you include the little-used side trip to Dickson Glacier. Since the climate in the area is unstable and most likely there are going to be bad days, it is desirable to consider at least 11 walking days. | |
{{Tarifa Parque Nacional Torres del Paine_en}} | {{Tarifa Parque Nacional Torres del Paine_en}} | ||
| − | == | + | ==Recommendations == |
| − | === | + | === Total expected time=== |
| − | * | + | * Consider at least 3 days of bad weather to avoid walking under the rain, especially on John Gardner Pass. |
| − | * | + | * Highly recommended to download [http://www.torresdelpaine.com/img/secciones/02/a/iconos/TDP.pdf the oficial map], with all the trails and expected times, or the also very complete [http://www.parquetorresdelpaine.cl/upload/files/Folleto20132.jpg CONAF map]. |
| + | |||
| + | ===Recommended gear=== | ||
| + | * Shoes: Leather. Ideally, without patches of cloth, or with waterproof Gore-Tex membrane, since you will have to deal with muddy areas, and snow and/or heavy rains are not uncommon. Soles must be in good condition to face slippery ground. | ||
| + | * Clothing: Weather varies quickly. Use hollow synthetic fibers as first layer, as they do not absorb water and keep the temperature. Avoid cotton or jeans. Waterproof and breathable jacket or pants are a must. | ||
| + | * Hats: one for the sun and one for the cold. | ||
| + | * Sunglasses: must have effective UV protection, since the ozone layer is weakened in this region | ||
| + | * Backpack: must be comfortable and spacious, to avoid carrying hanging gear. Do not forget to bring your raincover | ||
| + | * Tent: It doesn't have to be an expensive technical tent, but a self-deployed beach tent is not enough for patagonian gusts | ||
| + | * Stove: light, propane or gas. Avoid heavy camping stoves designed for motorized camping. The pots should also be light, not ordinary domestic pots | ||
| + | * Headlamp | ||
| + | * Sleeping bag: Torres del Paine is not very cold during the summer, so a midrange sleeping bag is okey | ||
| + | * Sunscreen | ||
| + | * Penknife, lightweight plastic cookware | ||
| − | === | + | ==== Desirable gear ==== |
| − | * | + | * Poles: a pair of trekking poles, or ski poles if the former is not available, are often useful, especially for descents and to cross streams |
| − | * | + | * GPS or, lacking that, a compass. With GPS and [[Media:Trekking_Torres_del_Paine.kmz|the KMZ file]] navigation is easier, although the circuit do not present any difficulty to manage without GPS. |
| − | + | * Trekking socks trail: It is advisable to wear specialized socks. After 8 days of walking, they really make a difference compared to ordinary socks. | |
| − | + | * First Aid Kit | |
| − | + | ||
| − | + | ||
| − | * | + | |
| − | + | ||
| − | + | ||
| − | * | + | |
{{abastecimiento Torres del Paine_en}} | {{abastecimiento Torres del Paine_en}} | ||
| − | == | + | ==Speed record== |
| − | + | 18:30, by Andy Tubbs from the U.S. [http://www.mer.cl/Pages/NewsDetail.aspx?dt=2012-02-19&PaginaId=2&bodyid=2 News] | |
| − | {{galeria de fotos Torres del Paine}} | + | {{galeria de fotos Torres del Paine en}} |
| − | {{Trekkings Chile}} | + | {{Trekkings Chile english}} |
Revisión actual del 17:35 20 oct 2021
Introduction
The Torres del Paine Trek is one of the most spectacular destinations in the world. In fact, according to a review of 9 specialized books that make their own selections of the best routes in the world, Torres del Paine is the most frequently named (you can check the study out in Best Treks / Hikes of the World, top 100). Unsurprisingly, it is extremely popular, and it is strongly advised to visit the route from November to early December, to avoid the massive flow of walkers of January and February.
Before you start with this description, please read the Suggested itineraries, to decide what's the best way to enjoy your days there. You can also get a general idea of Torres del Paine National Park.
Note that although this route is located in Patagonia, famous by its remoteness and harsh climate, this is a low altitude trek and equiped with good infrastructure, so it's a trip that anyone reasonable fit can do, with or without experience, and certainly without guides.
That said, if you have no experience whatsoever trekking, it is especially important to pay attention to the advicse regarding equipment and food: it is very common for inexperienced people who rush to this hike to suffer carrying heavy and/or very poor quality food or equipment. While it is a challenge that anyone can take, you can not just bring the family pot that weights half a kilo from home, a solid stove designed for car-based camping, or those bulky shoes more oriented to industrial tasks than to the idea of walking 7 hours day.
And now, enjoy!
Best season
The best time for this route is between November and March. November and December are ideal, when the weather has improved, the days are long and there are not as many people doing the circuit as in January or February. Winter is a beautiful time, but the circuit is too lonely for these months, and so at that time is the W circuit is preferable, or the far less ambitious hike to the Base of the Torres del Paine.
Access
From Chile (Punta Arenas)
To get to Punta Arenas there are three options:
- Airway: There are daily flights from Santiago to Punta Arenas. The trip takes about 4 hours and if it's clear you can see from the air the Patagonian fjords, ice fields and the Torres del Paine themselves.
- Sea: There is a 4 day trip highly recommended, either from Puerto Montt to Puerto Natales or vice versa. It takes you through the wonderful maze of canals and the Gulf of Penas. It passes by Puerto Eden, a small village inhabited by fishermen and refuge of the last alacalufes, and also a starting point to the impressive glacier Pio XII.
- By Land: The journey takes 36 hours between Puerto Montt and Punta Arenas, but it is the cheapest option. It lets you know the pampa and its estancias, where the huge distances have shaped the character of this region.
Depending on the amount of time availabe and on your resources it is advisable to combine different means of transport to get in and out of Patagonia, thus to get a fuller view of the region.
By car
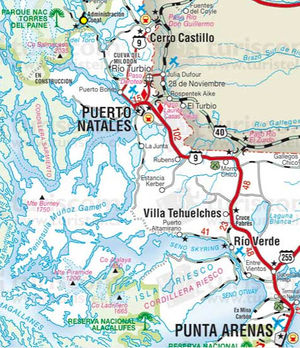
From Punta Arenas there are 254 kilometers by paved way to Puerto Natales. From there, there are two options:
- Old road through Cerro Castillo: Continue to Cerro Castillo, 60 km of paved road. Once in the village, turn left (west) and continue along a gravel road. 44 kms later there is a bifurcation: two roads lead to the park. Take right. After an additional 9 kilometers (113 and 367 from Puerto Natales from Punta Arenas) the CONAF (ranger) post of Laguna Amarga is reached.
- New road to Villa Serrano: From Puerto Natales, advance 16 kms along the old route (towards Cerro Castillo) to the turnoff to the left that leads to the Milodon Cave. The cave is reached after 7 kilometers of road gravel. Since the cave, there is a stretch of 65 kilometers of gravel until the administrative center of the park, at Villa Serrano. From there, continue along the gorgeous main road of the National Park, which 39 kilometers later reaches the CONAF (ranger) post of Laguna Amarga
Public transport and hitchhiking
All phones with codes 56-61
It may seem unbelievable, but there are no direct buses from Punta Arenas to the park, so you have to stop in Puerto Natales. As the second and final trip to the park from Puerto Natales is at 14:30, from Punta Arenas to Puerto Natales you can take the buses that leave at 8:30 and 10 to arrive before 14:30 and get to the park on the same day (it takes about 3 hours between the two cities).
Buses from Puerto Natales to Torres del Paine National Park will leave you at Laguna Amarga. From that point, it's about an hour of additional hike along the road to Hosteria Las Torres, the usual start of the trekking. This last stretch can also be done in minibuses that wait for the arrival of the buses from Puerto Natales.
Punta Arenas - Puerto Natales
- Buses Pacheco ($ 4,000, $ 7,000 roundtrip)
- Frequencies: daily from Punta Arenas: 8:30 - 10 - 14 - 18 - 19:30 hrs.-
- Heads back at 7.30 - 10 - 13:30 - 16 - 19:30 hrs.-
- To corroborate schedules: here.
- Punta Arenas: 900 Avenida Colon T: 242174 and 241162
- Puerto Natales: Ramirez 224 T: 414800, 415123, 414800
- Buses Fernández ($ 5,000)
- Frequencies: daily from Punta Arenas: 8-9 - 13 - 14:30 - 17 - 18:30 - 20
- To corroborate schedules: here
- Armando Sanhueza 745
- T: 221429
- Bus Sur
- Frequencies: daily from Punta Arenas: 9 - 15 - 17 to 19 hrs
- José Menéndez 552
- T: 614224-614225
Puerto Natales - Torres del Paine National Park From Puerto Natales, between December and February there are two buses a day to the park, at 7 am and 2:30 p.m.. In November, March and April the are only buses that depart at 7am.
- Bus Sur: Baquedano 668 T: 614220-614221
- Tourismo JBA Patagonia: Prat 258, 412 824
- Buses Gomez Prat 234-A. T: 415700 ($ 12,000 round trip in January 2009)
- Bus transfer: Bulnes 518 T: 412 616
- Buses María José: Esmeralda 869 T: 410951
Torres del Paine National Park from El Calafate, Argentina
By car
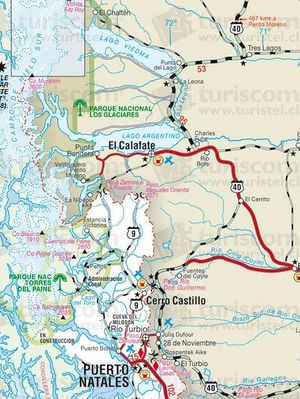
From El Calafate, it is 284 kms to the border in Río Don Guillermo, close to Cerro Castillo. From there, it's another 58 km. of gravel road to the CONAF post at Laguna Amarga, in Torres del Paine National Park.
El Calafate, in turn, is located 215 kms south of El Chalten, the other trekking hot spot of the region.
Public transport and hitchhiking
Tourism Zaahj drives the route El Calafate - Cerro Castillo - Puerto Natales. Get off the bus at Cerro Castillo and wait for the buses described in the previous section coming from Puerto Natales.
Schedules
- Tuesday - Thursday - Saturday: 8:00
- Monday - Friday: 16:30
The trip takes 5 hours to Puerto Natales, but it depends on the immigration control in both Argentina and Chile.
Office El Calafate:
- Bus Terminal, Office 07, El Calafate, Argentina.
- Phone / Fax: 54-2902-491631.
Torres del Paine National Park opening times
Office hours in Sarmiento and Laguna Amarga: 8.30 to 20.30, all year round.
Transportation from CONAFpost in Laguna Amarga to Hosteria Las Torres (start of the trekking)
To get to the lodge there are two options: walk 7 km by road vehicle (1.5 hours) or take a transfer of $ 2,500 / ea. There are also good options to hitchhike if traveling in a small group.
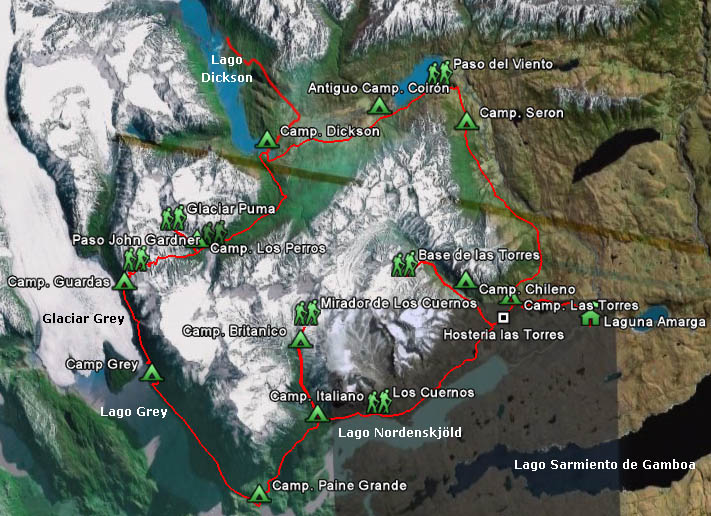
Description of the route
The Paine Circuit is a walk of 8 effective days (increasing to 9 if you chooso to walk to Dickson Glacier as well). It must be done counterclockwise from Serón to Grey, and it includes two full day sidetrips (Valle del Francés and the base of Torres del Paine) and a branch of a couple of hours (Glacier Punta Puma)
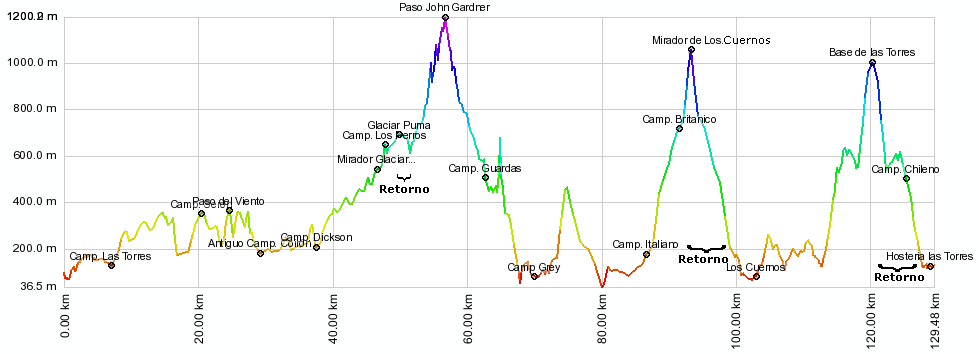
The following image shows the altitude profile of the route. Note that this is a low altitude trek, but, given the harsh climate of the place, mountain conditions can occur even in the summer months.
Day 1: Hostería Las Torres - Serón
Note: Altough it has been designated as day 1, it may also be the 2nd day if you choose to hike to the base of Torres del Paine (day 8 here) first instead of last.
The path to the circuit starts behind the lodge "Las Torres". After a little more than 100 meters the first sign appears, showing the path towards Seron camp. Climb a small hill and then cross a wooden gate (please close it once crossed, like all others). The trail traverses an open, uncluttered area with scattered trees (especially beech and notros). From this point, Mount Almirante Nieto (2,640 m) starts to dissapear, after dominating the area of Las Torres.
Laguna Amarga then appears. The entrance to the National Park and the vehicular road to the area of plains become visible. It is an lower area, with a more stable and drier climate than the western side of the park, whose mountains trap moisture from the Pacific. Behind us we can see, in the distance, Mount Balmaceda (2,036 m). After about half an hour a second wooden gate has to crossed to start walking through a wooded area, where soon another signaling post appears, and a fence runs parallel to the path we have been following. Fifteen minutes later, a small spring is crossed through a wooden bridge. Continuing along the path, it will enter and exit the forest cyclically another cpuple of times.
After about an hour of walking, a new signal is shown. From this point, we can see Laguna Azul in the distance, and the Paine river in the lower valley. Now it will be seen more clearly in the whole area of the northeastern shore of Paine (the opposite bank of our trail), the effects of the fire that broke out on February 17, 2005.
After an hour and half, you pass over a second stream, opposite to Laguna Azul and with good view of the valley of Paine, the river that gives the park its name. The trail then circles the Paine (1,508 m., not to be confused with the Paine Grande of 3,050 m and the southernmost "three thousand" of America), whose slopes contain lots of burned logs due to frequent fires of the twentieth century. Ahead, there will be a major creek, to which the trail gently descends, carrying a significant amount of water. Then there is a new wooden gate, and then the trail descends to an open area with some ñirres on the sides.
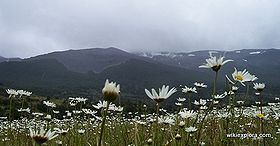
Later the path goes down to a confluence of two paths: the one we have been following and the one that comes from Laguna Amarga. There's a new poster and another locking wooden bar. We are now in a wide, flat terrain to traverse along the Paine River, beautifully covered with daisies and some ñirres, isolated or in small forests. After 20 minutes there is a rustic railing provided with a rope. When you get closer to the river, there will be a forest of ñirres.
Shortly before Serón a fence must be crossed. The track passes along a slope where the hill reaches river, the last point before reaching the site. There is a stream with clean water, several picnic tables by the "puesto" of the old estancia, and a small warehouse.
All campsites must be paid in advance, and you will not be able to start the hike if you can't show the rangers that you have a booking for each campsite on consecutive nights.
- Total expected time for this section: 3h 20'
Day 2: Serón - Dickson
From Seron advance 200 meters parallel to a fence, and then cross it. The walk still goes through the meadow of daisies and occasional ñirres. It will continue along a marshy area located to the right of the path. After about 25 minutes, it passes through a stream that flows to a tributary of the Paine River. Then the trail climbs along the river and becomes more rocky, while the first neneos arise, a curious shrub with a rounded form, as well as some calafates (possibly without its famous fruit, due to the frequent passage of walkers). After 250 meters, it will be possible to observe a lagoon with a characteristic kidney shape, at which point there is a sign indicating the route. It will then start a zigzag ascent along a section of screes, to an altitude of 400 meters, in the so called Paso del Viento ("windy pass"), a name well earned. At that point, the trail bends to the west, allowing the Paine lake to be observed in its entirety. From this point, you enter a wilder area of the park, and the path forward is clearly seen: the way to Coirón, the Dickson camp, Los Perros Glacier to the left and the valley leading to the John Garner Pass. To the right, away from the trail, Mount Ohnet of 1,929m can be seen. The path descends by the side of Paine Lake. Half way there is a small spring. After the second half of the lake, progress is retarded by fluctuating ups and downs.
An hour and a half after Paso del Viento you arrive at an old camp at Coirón. The place is deserted, devoid of natural attractions and is very close to Serón, making it a bad choice for camping. There is a small stream. Ten minutes later, we reach the stream that comes from the waterfall visible upslope. The trails then continues along the hillside, past a marshy area on the right. You can now see more clearly Los Perros Glacier. Dickson Glacier is also visible under the Daudet and Cubo mountains, one of the many drains of the east side of the Southern Ice Field, . A flat stretch follows, with some minor hills. Near the lake, you can see the unusual view from the north of Torres del Paine, and mount Oggioni (1,697 m.) to the left.
This area is marked with stakes, at whose sides there are numerous traces of the twentieth century fires made to clear grasslands for livestock. About two hours after Coirón you reach the foot of a hill, where there is an abandoned building in a marshy area. Only half an hour later you arrive to Dickson.
All campsites must be paid in advance, and you will not be able to start the hike if you can't show the rangers that you have a booking for each campsite on consecutive nights.
- Total expected time for this section: 5h 40'
Optional day: Dickson Glacier
First, it is necessary to cross the river in a zodiac, available during the summer months, which can be booked at the campsite. A flag in the place gives notice of leaving trekkers. Once on the other side of the lake, walk up the slope to get on the path leading to Paine lake. To the left there is a hill and to the right the Paine River. The trail continues north around a rock plateau located to the left, untill it reaches an open field. The unusual north face of Torres del Paine can be observed, and the range that leads to Paso John Garner (the one that will be faced in two more days).
After 30-35 minutes you will find stakes at the left of the road, traces of an old fence. A sign indicates to "Carabineros" (police). At that point you should turn left and continue parallel to the stakes towards the Dickson glacier. The trail is fuzzy on this stretch, so it is important tofollow the old fence or the orange stakes, in a rather flat terrain. To the left there is a rock plateau. Then you will enter a wooded area, and in a short while you will cross a stream. After 10 minutes the trail turns to the left, towards a gorge, where a there is a pass. But our route ascends a hill and then goes through the side of a scree.
After half an hour you get to Quemado Lake (300 m) east of Lake Dickson, in an environment marked by ancient fires, but that is slowly recovering. The trail goes up and down several times. After a half hour from Quemado Lake, you will return to an area of mature forest, not destroyed by fires. The trail here is marked with orange color. There are wooden bridges and walkways built by Carabineros. As the forest is left behind, the glacier appears. The trail goes through a swampy area and then reaches a small hill to the left, which we recommend to climb, to take advantage of its magnificent view.
About 15 minutes later, after passing another forest with streams and bridges, the trail climbs to an open space where the Carabineros post is located, to covers the border area adjacent to Southern Ice Field. Few minutes past the police post you will find the splendid Dickson viewpoint, where the mountains Daudet and Cube will be observed, besides the glacier.
- Total expected time for this section: 2h 55' one way, 2h 30' to go back, plus the time required to cross the river.
Day 3: Dickson - Los Perros
The day starts with the path marked by a flag, which leads to a dense forest composed mainly of lengas, but also by coigües and notros. After 15 minutes you will be see at your back Dickson Lake and the glacier of the same name. At 350 meters of altitude you must cross an old fence. A more mature forest follows, and a wooden walkway follows.
Then there is a great viewpoint in an open partly-flooded space. There is a small hill with good views. The trail turns left along the marshy area and then descends to the Cabeza del Indio River, where a wooded bridge. The track then climbs a muddy area and advances to the southwest along the Los Perros river valley. After about half an hour from Cabeza del Indio there will be a waterfall. The trail continues next to the river, with little slope, under the shadow of the forest, interrupted by occasional fallen trees and frequent streams of fresh water.
Two and a half hours after the waterfall a suspension bridge that crosses the Perros River is reached. At this point, Los Perros Glacier becomes visible. The trail climbs the moraine in a stretch where the trail becomes less clear. After 15 minutes the top of the small moraine is reached, boasting a beautiful view of the glacier and its lagoon, usually populated by floating ice. We also see the route to "El Paso". Go on along the the moraine. The campsite is located in a lenga forest, at 540m. There is a small store, restrooms and sites for bonfires.
All campsites must be paid in advance, and you will not be able to start the hike if you can't show the rangers that you have a booking for each campsite on consecutive nights.
- Total expected time for this section: 4h 20'
Side hike to Punta Puma Glacier
From Los Perros, follow the track that leads to the pass. After crossing the river by the bridge, continue straight along the river O'Brien instead of turning left towards the pass. You will walk by the river in a space devoid of vegetation. When it's no longer possible to continue on this course, make your re-entry to the forest. The trail is blurred and it lacks signs, but it's easy enough to advance parallel to the river, under the shade of a dense forest. Then you will walk up a hillside and the river will be visible down, in a narrow bed.
After about 25 minutes, you will reach an area of scrubby vegetation growing on the moraine, from which point the Punta Puma glacier is already visible.
Then you have to cross a small barrier of loose stones before reaching a rocky terrain, devoid of vegetation. An isolated clump of young lengas surprises in this landscape. The remaining distance to the glacier is just a path of little slope.
After an hour of walking, and at 750 meters of altitude, the glacier is reached. The lower end is covered with rocks. and flows with a gentle slope to the valley. You can walk a little over it, to an area of white ice. If you do this branch, it is advisable to go if you arrive no to late to Los Perros, but it is not recommended to allocate a full day to it.
- Total expected time for this section: 1h to the glacier, 45' back
Day 4: Los Perros - Paso John Gardner - Guardas
This is the hardest day. From Los Perros continue down the path across the river by the footbridge. Then turn left, heading towards the Pass. The trail has been marked in the trees for some stretch. Then cross a swampy area (it's the only part of the whole trek where gaiters would de helpful) that will last for the next hour. There are some open areas with good views. After an hour and a half, at 760m, the trails approaches the Paso river, Cross guided by the orange markings on a narrower section. It is important to get this place right, because it is not easy to cross at other points. The path continues climbing on the other side of the river, leaving behind the swampy area. Now it is usually windy, and the terrain rocky, with the orange markings on the rocks. From several hundred meters below the pass, it becomes likely to find snow even in the summer months. If there is rain forecasted for the park, it is likely that here it will snow.
John Gardner pass is at 1200 m., 1 ½ hours beyond the river crossing. It allowes to cross the massif of the Cordillera del Paine to the western sector of the park. The views of the Southern Ice Fields and Grey Glacier are spectacular, so, coupled with the possibility of snowfall described, it is strongly suggested to do it only with good weather. There are orange rods that serve to guide the way when the weather worsens the visibility. The descent follows a moraine, always with stunning view. The retreat of the glacier can be appreciated: the former nunatak is now a peninsula, and has recently appeared a second nunatak. After 15 minutes of descent, at 950m. the first glimpses of vegetation appear, with some lengas dwarfed and bent by the wind. As you walk through the forest, the glacier is visible through the branches. The descent is steep and demanding.
At 550 m. and after just under 2 hours of descent, an old camp sector is reached. It's a rather narrow place, nestled among the trees, indicated by the sign "Camp El Paso." Continue in a southerly direction parallel to the glacier. There are some areas with large lengas.
After 40 minutes from the previous point, you arrrive to camp El Paso, located in a narrow sector along the trail, by a creek. There is a small bathroom and an open container that serves as a shelter and natural gathering place for campers. It lacks services or toilets, but it's free.
- Total expected time for this section (untill El Paso): 5h 45'
Note
From this point (which in this review are listed as days 5 and 6) how to distribute your time is not as clear as on days 1 to 4. Day 7 clearly will be to Hosteria Las Torres but the starting point may vary. Day 8 (which can also be day 1) is almost fixed too (except for those willing to follow the Valle del Silencio, who may take two days) so only days 6 and 7 show a significant dispersion of options among trekkers.
- Option 1: recommended in this review. Camp at Guardas (free camping but no services. Next day, walk to Paine Grande. Next day, go to Camp Italiano, leave the camping gear, continue to Valle del Francés and back to Camp Italiano.
- Option 2: Camp at El Paso. Next day, walk to Paine Grande (a demanding day), and the next day go to Camp Italiano, leave the camping gear, continue to Valle del Francés and back to Camp Italiano.
- Option 3: Camp at Guardas. Next day walk to Paine Grande, and the next day go to the Camp Británico. Then follow from Británico to Las Torres in a single tranche.
- Option 4: Keep walking to the camp Grey, in other 4-4 1/2 hours (a pretty hard day). Next day, reach the camp Italiano, and the next day go up and down Valle del Francés.
- Other options that combine the above.
From the pass, climb a long slope that leads to a viewpoint of the Grey. The trail continues well marked with many ups and downs, and frequent roots that must be overcome. Several small streams and a second viewpoint is then crossed. Then, keep going through an area of cliffs and old fires, where there are visible traces of burned trees. After an hour of walking you will find a larger creek, where a rustic ladder helps the ascent. It is followed by a steep cliff on the banks of the Grey Glacier. Twenty minutes later, there is another gorge provided with a wooden staircase. Past the cliffs area, you reenter the forest of lengas and coigües. Then follows another creek, with huge cliffs that drop to the glacier.
- Total expected time for this section (untill Los Guardas): 8h 45'
Day 5: Guardas - Paine Grande
From Los Guardas the route continues through the forest. After 35 minutes a viewpoint of Grey Glacier is reached. Then the trail leaves the glacier and takes us through forest. An hour and a half from Los Guardas there is a signposted junction leading to the refugio and to the trail that leads to the viewpoint.
The refugio is beside the lake of the same name, in the middle of a lenga forest, adjacent to a sandy beach. From there also comes another trail that leads to the viewpoint of the glacier. There is camping, storage, shelter and guided walks over the glacier.
The trail to Lake Pehoe advances through flat land, in a southeasterly direction. The terrain is smooth, and after 15 minutes there is a short climb and then it continues at the same altitude, to reach the bridge over the river Olguin, located on a narrow stretch of the river. After half an hour from the refugio the trail climbs quite a bit through rough terrain. It is a muddy area, with abundant vegetation. After the highest point is reached, the path continues with the Grey Lake to our right. Later, there is another climb, an area where is not uncommon to find some water dripping. In this new ascent, there is a viewpoint towards the glacier, lake and its icebergs. Then follows a rocky path, that ascends to 450 m.
After just under 2 hours of walking, having left behind a flat stretch with small lengas, the trail begins to descend gently to the "Quebrada de los Vientos" area, right after a section of rounded boulders where the south beach of Lake Grey is visible, normally populated by ice (and tourists, given its access by road). Walk around the side of a small lagoon and continue to descend, with the incredible emerald Lake Pehoe as backdrop.
Refugio Paine Grande (ex Pehoé) is situated adjacent to Lake Pehoe and has a wide but windy paid camping ($ 4000 p / p). It is commonly fully booked, so get there early if you plan to sleep. There are toilets and well-stocked store (even T-shirts and souvenirs are sold). There is also a hotel. From this point you can either:
- Continue the trek to Valle del Francés (thes route this article describes)
- Walk to the park entrance along a flat (and somewhat boring) trail, flanking the Grey River (5 hours),
- Take the catamaran to Pudeto .
- Total expected time for this section : 5h 35'
Day 6: Paine Grande - Valle del Francés
From Refugio Paine Grande, continue towards Valle del Francés (or "French Valley") along a clear path that runs along the northern shore of Pehoe Lake. Within a few minutes there is a slight rise that hides the lake behind us. Appreciate the Cuernos del Paine ahead (2,600 m the highest). Then the trail becomes winding, and enters a flat area, with little vegetation due to the persistent wind. Then a stream is crosseb with a wooden plank.
The trail passes at the foot of Punta Bariloche (2,600 m). After 30 minutes Skottsberg Lake appears, known for occasional wind eddies that form in its waters. The trail continues along the western bank of the lake, overlooking the Paine Grande (3,050 m.), the southernmost "threethousand" of America. A small waterfall and some glaciarettes are visible on the left. Several springs come from the hillsides and cross the path. In one of them, there is an orange arrow that shows the way to a more comfortable path.
After walking 40 minutes along Skottsberg Lake, the end of it is reached. At that point there was a dense forest of lenga and coigüe de magalllanes, which unfortunately burned in the fire 2011-12 (although there are still burned trees). The trail ascends slightly, and there are some wooden steps. Fifteen minutes later, you will pass a small pond on the right. There are several wooden walkways. After another half hour of hiking, you will appreciate the full scale of the Paine Grande Massif, with its majestic ice. In this area the trees form larger and denser forest of notros. After crossing the Francés river by two suspension bridges you reach the camp Italiano, located at 220 meters above sea level amidst a beautiful forest of lengas. The setting of this camp is beautiful, facing Paine Grande and the Francés Glacier. It's free and there are toilets. From here you can continue into the valley, one of the most beautiful corners of the park. The ideal place to fully enjoy the area is to camp.
The route into the Valle del Francés (the intermediate vertical stroke of the "W") begins at camp Italiano, where the path moves northwards along the eastern bank of the Francés river. Once out of the forest, it climbs up trough a rocky terrain. There are many stones painted with orange marks. After 25 minutes, the Nordenskjold Lake appears on the horizon, at a point where there is a deep ravine with water at the bottom. The track then climbs a rocky area with both Francés glacier and Paine Grande visible on the left. About 10 to 15 minutes later you come to a sharp rise, well equipped with fixed ropes. It then continues along a ridge through a forest of lengas. To the right there is a little depression, behind which the walls of the Cuernos del Paine (2,600 m) rise. Marching for another hour, a stream is reached. The orange marks persist on the right. The trail goes up sharply, along a stream. From there, it follows by a lenga forest.
After 1 hour and twenty minutes from the camp Italiano, you get to an open and windy place, called "Mirador" (680m), from where the valley is dominated. To the east, Hoja (or "sheet", 2,200 m), Espada ( or "sword" 2,500 m) and Fortaleza ( "fortress", 2,681 m) are visible. Heading south, Nordenskjold, Pehoe and Toro lakes are also visible. Soon, the trail returns to the forest shade. Hopefully, you will hear the fall of some serac falling from Paine Grande. The trail continues under the shade of the trees keeping the altitude, parallel to the river. The notorious Aleta de Tiburón ("Shark's Fin", 1,717 m), so named for its shape, can be appreciated. There are marks on the trees now, and the path climbs gently. The trail then leaves the forest to an open, marshy area, which constitutes a second viewpoint. Oranges marks become the guide to reentry the forest.
After more than an hour from the viewpoint, the Británico camp is reached. It lacks services, but it's free, and an excellent place to camp. Only five minutes after that, you pass through an area of white stones. Then the trail climbs a steep and rocky sector.
Fifteen minutes later the Británico, we reach the lookout La Piedra ("The Stone" 1,100 m), a great place to admire the Espada (2,500 m), Hoja (2200), Máscara ("mask" 2,300 m), Cuerno Norte (2,400 m), Aleta de Tiburón(1,717 m), Cabeza de Indio ( "Indian Head" 2,230 m), Fortaleza (2,681 m), Escudo ("Shield" 2,440 m), Trono Blanco ( "White Throne" 2,197 m), Catedral ("Cathedral", 2,168 m), Punta Catalina (2,100 m), Aguja ("Needle" 1,703 m) and Cota 2000 (2.000 m).
- Total expected time: 2h 25 ' from Paine Grande to Camp Italiano. 2h 55 from the Italiano to Mirador La Piedra and 2h back to Italiano. Total: 7h 20 '
Day 7: Valle del Francés - Hostería Las Torres (Los Cuernos del Paine)
From Italiano Camp, the trail goes down toward the southwest and continues along the northern shore of Lake Nordenskjold, at the foot of the massif of the Cuernos del Paine, whose impressive granite walls are visible most of the way. First you must cross a wooded area. After 10 minutes, an area of peat and vegetation stunted by the wind is reached. This entire section usually has a lot of mud, although there are wooden bridges in the worst areas. The path is gets closer to the lake, until it reaches the shore. Then it follows the beach, and it goes back to the forest after that. We return to the forest to reach the camping / shelter Cuernos, right at the foot of the Cuerno Este (2,200 m), as well as the stream that descends from the Bader Valley. That's about two hours from camp Italiano. It is also a beautiful viewpoint. There is a camp fee.
Just after that, a creek is crossed by a wooden walkway. Then it ascends to continue parallel to the lake. The Bader Valley, a beautiful but rarely visited area of the park, is visible to the left, between the Cuerno. You come to an area of numerous streams, that requires several ups and downs before it stabilizes. There is a beautiful view of Nordenskjold lake to the right.
The trail then continues farther from the lake, at the foot of Almirante Nieto (2,640 m) until it reaches a small lake on the right, next to a wetland. From this point begins the descent to the lodge.
Shortly before the Hosteria Las Torres is visible, you will se to the left the path that goes up to the base of the Torres del Paine. A suspension bridge crosses over the Ascencio river and then finally heads to Hosteria Las Torres, where there is also camping and a hostel sector. There is a forest of ñirres and several creeks. The place is very busy between December and February.
- Total expected time: 5h 45'
Day 8: Torres del Paine (2 days if you extend it to Valle del Silencio)
This is by far the most popular walk of Torres del Paine National Park. It can be crowded from late december to the end of february. The trail is, therefore, very clear. From Hosteria Las Torres, the path penetrates into the valley. After 10 minutes, an old suspension bridge crosses the Ascensio river. About 150 meters further you will find a bifurcation: to the left it leads to the our destination, and on the right it heads towards Los Cuernos and Valle del Francés. Then, it follows a zig zag in a slope sparsely vegetated and very well marked. The lack of vegetation and high traffic has badly eroded the area and formed several parallel tracks, so take care to keep in the main track and avoid further erosion. The there is another trail at left that leads to Los Cuernos. You gain near 375 meters in this section (from 135 meters to about 500 m.). Then there is a drop of 50 meters, after which the path becomes far less steep. Consider about an hour to this spot. You will then cross a spring. After 45 minutes from the end of the zig zag, Chileno Camp is reached, on the opposite bank of the Ascensio river, in the shade of a lenga forest. There is a bridge to get there. The camping costs $ 4,000 per person and there is a cafe, but no store.
No need to cross the river because the trail always continues along the southwest bank. In the following section, the trail gets into the forest of lenga, with a fairly moderate slope. It crosses several small streams that drain the north face of Almirante Nieto. After about 70 minutes from Chileno, at 700 m., the foot of the moraine that gives access to the lookout is reached. There is a sign indicating the trail to the lookout and fork to Las Torres camp (with toilet). The last leg of the hike is far steeper. Continue next to a stream, under the shade of small trees located on the edge of the moraine. Further up, the trail dissapears and you will have to walk over the bare rocks, some of which are marked to show the route. After 45 minutes from the sign "700 meters", you will be at the east end of the lagoon. The landscape is wonderful, with the three towers (Central, Monzino, De Agostini) in full view, and the mountains Peineta and Nido de Cóndores.
- Total expected time for this section: Three and a half hours up, two hours return, plus the well deserved time off to take pictures in the viewpoint.
Total expected time for the whole Torres del Paine circuit
This review shows 8 days, or 9 if you include the little-used side trip to Dickson Glacier. Since the climate in the area is unstable and most likely there are going to be bad days, it is desirable to consider at least 11 walking days.
Torres del Paine National Park fees
All campsites must be paid in advance, and you will not be able to start the hike on day 1 if you can't show the rangers that you have a booking for each campsite on consecutive nights.
(Chilean pesos (1 $US equals aprox $600))
| High season (01 oct-30 apr) |
Low season (01 may-30 sep) | |
| Chileans | $5.000 | $3.000 |
| Foreigners | $18.000 | $10.000 |
| Children | $500 | $400 |
Updates in park fees can be checked here
Campsites
- Torres: $6.000
- Chileno: $6.000
- Base Torres: gratuito
- Cuernos: $8.000
- Italiano: gratuito
- Británico: gratuito
- Paine Grande: $4.800
- Grey: $4.000
- Serón: $4.000
- Dickson: $4.000
- Los Perros: $4.000
- Paso: gratuito
- Los Guardas: gratuito
Shelters
- Torre Central: bed with sheets, pillow and blanket: $38.000
- Cuernos: bed: $24.500 / bed with sleeping bag: $28.500 (there are no sheets here)
- Paine Grande: bed: $26.500 / bed with sheets: $40.000
- Grey: bed:$17.300 / bed with sheets: $40.000
Recommendations
Total expected time
- Consider at least 3 days of bad weather to avoid walking under the rain, especially on John Gardner Pass.
- Highly recommended to download the oficial map, with all the trails and expected times, or the also very complete CONAF map.
Recommended gear
- Shoes: Leather. Ideally, without patches of cloth, or with waterproof Gore-Tex membrane, since you will have to deal with muddy areas, and snow and/or heavy rains are not uncommon. Soles must be in good condition to face slippery ground.
- Clothing: Weather varies quickly. Use hollow synthetic fibers as first layer, as they do not absorb water and keep the temperature. Avoid cotton or jeans. Waterproof and breathable jacket or pants are a must.
- Hats: one for the sun and one for the cold.
- Sunglasses: must have effective UV protection, since the ozone layer is weakened in this region
- Backpack: must be comfortable and spacious, to avoid carrying hanging gear. Do not forget to bring your raincover
- Tent: It doesn't have to be an expensive technical tent, but a self-deployed beach tent is not enough for patagonian gusts
- Stove: light, propane or gas. Avoid heavy camping stoves designed for motorized camping. The pots should also be light, not ordinary domestic pots
- Headlamp
- Sleeping bag: Torres del Paine is not very cold during the summer, so a midrange sleeping bag is okey
- Sunscreen
- Penknife, lightweight plastic cookware
Desirable gear
- Poles: a pair of trekking poles, or ski poles if the former is not available, are often useful, especially for descents and to cross streams
- GPS or, lacking that, a compass. With GPS and the KMZ file navigation is easier, although the circuit do not present any difficulty to manage without GPS.
- Trekking socks trail: It is advisable to wear specialized socks. After 8 days of walking, they really make a difference compared to ordinary socks.
- First Aid Kit
Supplies within the trails of Torres del Paine National Park
Some limited supplies are sold within the trails, at prices 3 to 4 times those of Punta Arenas. So you have the choice if you want a lighter backpack. The selling points are located at Hostería Las Torres, Serón (not always), Dickson, Los Perros, Grey and Paine Grande (former Pehoé). Bread is not always available, but groceries normally are.
Prices in february 2013 (CLP):
- 400 grams of pasta: $2.000
- Tomato sauce: $1.000
- Rice: $1.500
- Soup: $1.500
- Propane: $5.000
- Egg: $250
- Oat: $3.000 1kg
- Biscuits ("Triton"): $1.000
- Sliced bread: $2.000-$5.000 (it varies from camping to camping)
- Soda can: $1.500-$2.000
- Beer can: $2.500-$3.000
There are also sweets and chocolates, and batteries.
Electricity on the campsites works only for a couple of hours, so bring your batteries fully charged
You can also buy cooked meals at Base Torres, El Chileno, Cuernos, Paine Grande and Grey:
- Breakfast: $6.500
- Meal: $11.000
- Box lunch for the walk: $8.500
Speed record
18:30, by Andy Tubbs from the U.S. News
Photo gallery of Torres del Paine National Park
Photos of the whole park are included
To see the full list of 691 routes of trekking and mountain climbing in Chile in spanish, click here
| ||||
| Trekking Atacama | ||||
| Trekking Norte Chico | ||||
| Trekkings: | ||||
| Cumbres: | ||||
| Trekkings: | ||||
| Cumbres: | ||||
| Trekkings: | ||||
| Cumbres: | ||||
| Trekkings: |
| |||
| Cumbres: | ||||
| Trekking Rancagua | ||||
| Trekking San Fernando | ||||
| Trekking Curicó | ||||
| Trekking Talca | ||||
| Trekking Linares | ||||
| Trekking Chillán | ||||
| Trekking Concepción | ||||
| Trekking Los Angeles |
| |||
| Trekking Zona lacustre | Trekking Temuco | |||
| Trekking Valdivia | ||||
| Trekking Osorno | ||||
| Trekking Puerto Montt | ||||
| Trekking Chiloé | ||||
| Trekking Patagonia | Trekking Chaitén | |||
| Trekking Coyhaique | ||||
| Trekking Cochrane y Villa O`Higgins | ||||
| Trekking Puerto Natales | ▲ ENG:Milodón ▲ ENG:Trekking Torres del Paine | |||
| Trekking Punta Arenas | ||||
| Trekking Tierra del Fuego | ||||
| Trekking Isla de Pascua | ||||
| Trekking Archipiélago Juan Fernández | ||||


